
Here's how I made my bag:
I began with 5" charm pack squares, one embroidered, one plain, then cut 5" fleece and red cotton squares for my fabric sandwiches. I also used scissors, a sliding ruler, washable fabric marker, sew-on snaps, needles, thread. (not pictured: green thread)...

Two snap sets...

I marked 1" from the top of the red fabric, and 1 1/2" from the outside edges of the red fabric. Where the lines intersect is where I sewed my snap on...

For the second side, I placed my fabrics together and made a little dot for the opposite side. It was just a tiny bit off of the intersecting lines that I drew, but I wanted my snaps to line up perfectly...

I cut a charm square in half for the top binding. I then finger-pressed them in half, then in half again to make finished edges...

I placed my fabric sandwich (outside charm square, batting/fleece, red liner) together and inside my little binding strip...

I then folded the other side over to enclose the top raw edges...

Here are the safety pins I used to hold the binding on while I sewed it...

Front binding is on, back binding is ready to be sewn. I used green thread to match the green in the embroidery pattern. I really like the look, as it looks like I spent more than a few seconds thinking about it! ...

Both bindings are sewn and the snaps are placed perfect! Making those dots was really worth it! ...
Front...

Back...

I then sewed around the edges, beginning at the tops. I started at one top, sewed around to the bottom, then stopped after the bottom corner. I then began at the other top and worked my way around to complete the seam...

Other side...

Turned right side out, and found that when my fabric had shifted during my sewing, I had missed a section of the outside layer!! I only bound my fabric sandwich with one safety pin for each side (1 front/1 back = 2 pins). Next time, I will do some sort of basting that will hold everything in place for me. I recently saw how to use Elmer's School Glue, so I am really wanting to try it! ...

Back...

Sad bottom...

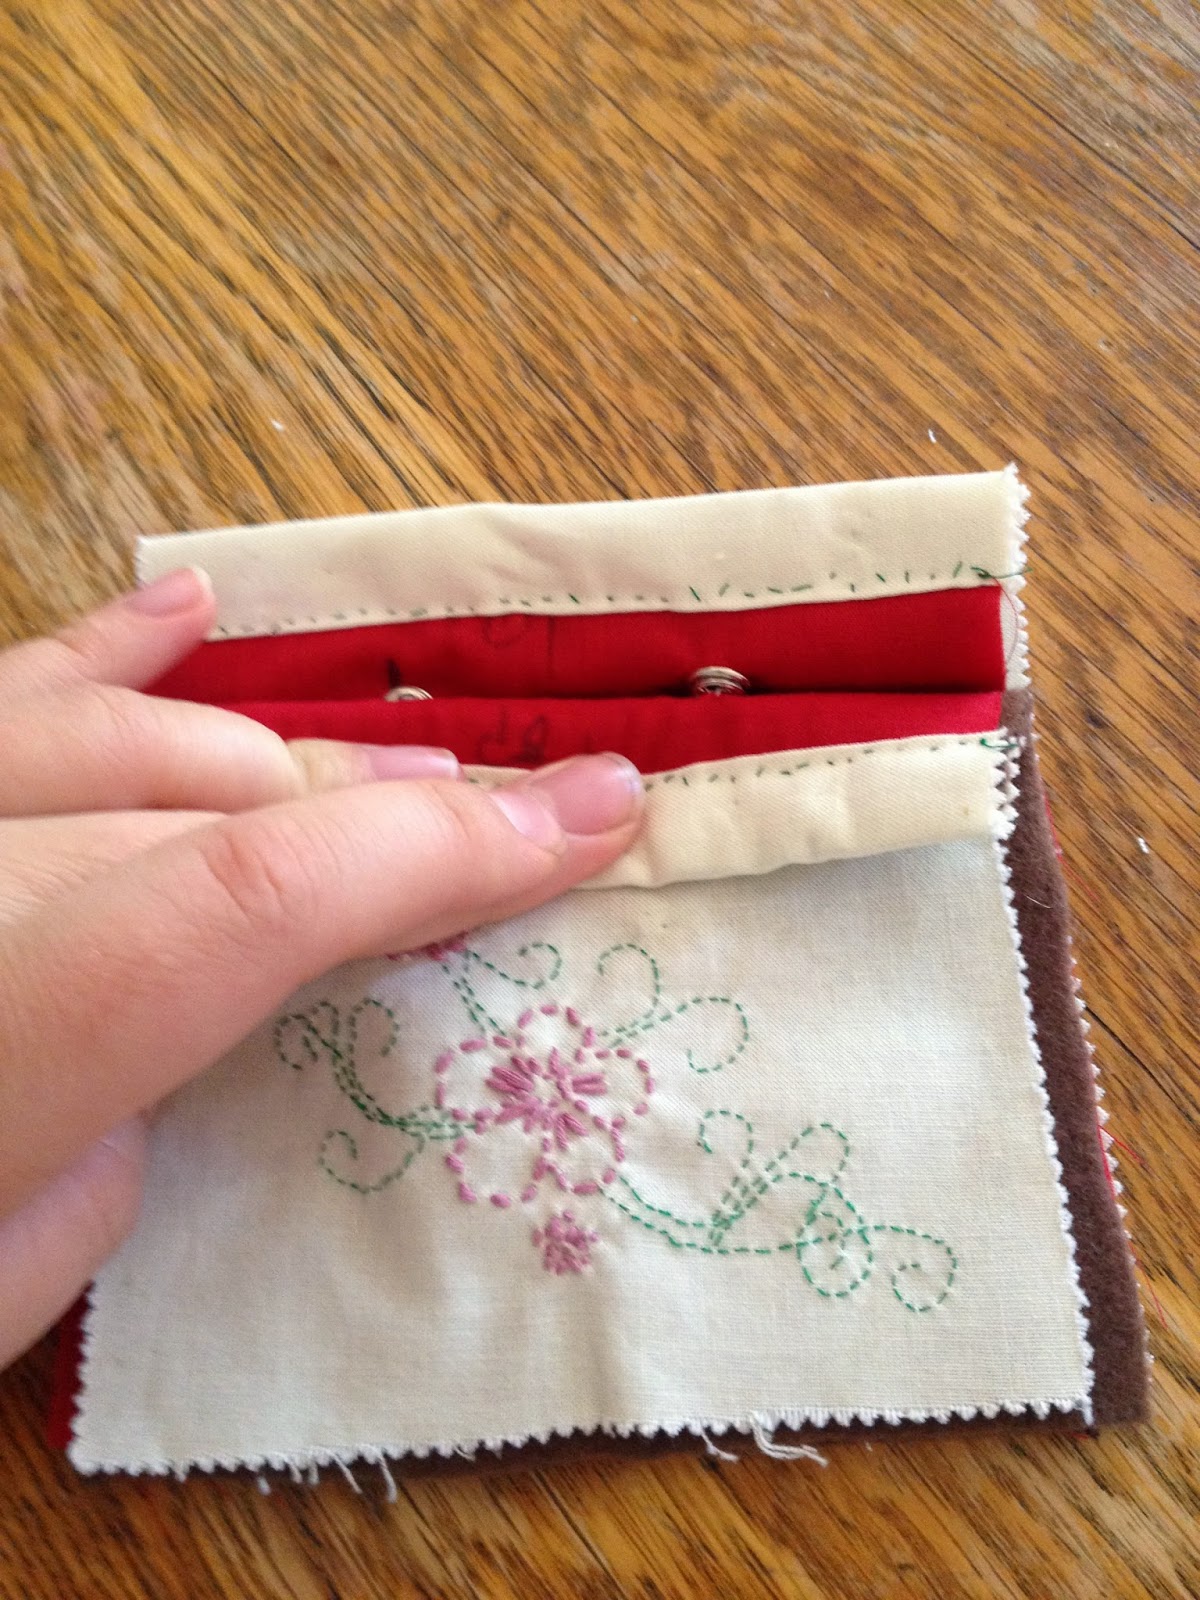
Top with the snaps open...

Top with the snaps closed...

I turned my little pouch wrong sides out again, and stitched the part that I had missed before...

Other side...

NOW it is all sewn up...

And the back...

I then did a finishing whip stitch all around the seams. I again began at the tops, though I started at the bottom of my binding, went up to the top edge, then back down and past the first corner. I then began on the other side using the same method. I used a third piece of thread for finishing the bottom...

Another angle

TADA! I am happy with my embroidery and my little bag. I have learned a lot making this! I now have a lovely place to store my Lifesavers in my purse, until I find another use for it. Maybe my essential oils. :-)

In the future, I will be using my sewing machine, so it will be way quicker and easier. And have less mistakes. I also will be basting my sandwiches together, which will cut down on movement and give me even seams that are complete. I'm really glad I tried this and learned how to hand sew better. I've learned more than I thought I would!
I hope you enjoyed this tutorial. Please leave me comments or share with anyone looking for a quick project for their 5" charm squares!
No comments:
Post a Comment